Gas Replacement Procedure
Purpose
This work instruction outlines the theory and steps to remove gas contaminates from the coldhead while installed in the magnet. [1]
There are many types of installations, most of which do not allow the cold head to warm up to room temperature. In those cases it has been observed that the cold head efficiency improves after performing this gas replacement.
It also improves symptoms of audible sounds that the cold head may be making. A few of those examples include intermittent motor slipping, squeaking, or thumping.
NOTE: In the event that this gas replacement doesn't correct the issue the cold head may have to be replaced entirely. In the worst cases the entire cryo-cooling system must be replaced.
Requirements
-
A helium charge kit capable of adjusting the pressure on the helium compressor.
-
A bottle of 5.0 UHP helium gas.
Work instructions
This work instruction can be performed with the magnet energized or ramped down.
Preparing the system:
- Turn the helium compressor off. This will also turn the cold head off and you should hear no gas moving through the helium lines.
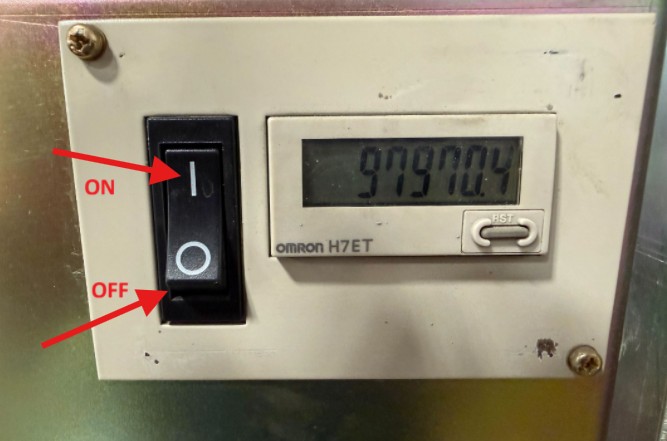
- On the helium compressor, locate the cold head service drive. This can be called a number of different things. On older helium compressors this is a switch on the back or on the front of the compressor. On newer compressors this is a control setting that must be navigated to in the control panel.
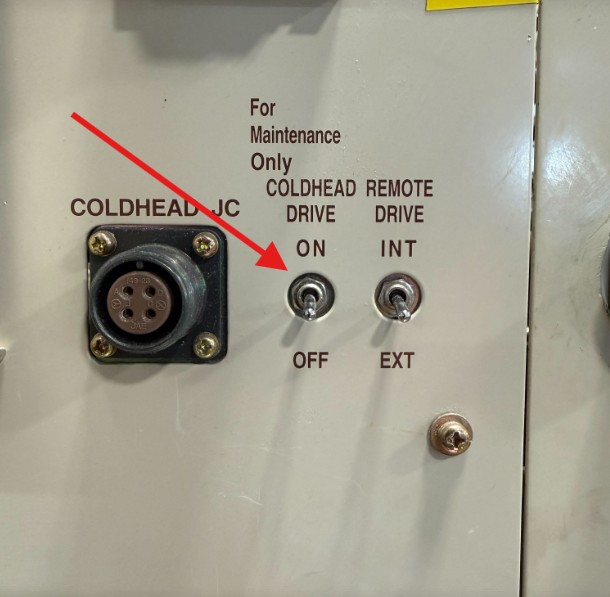
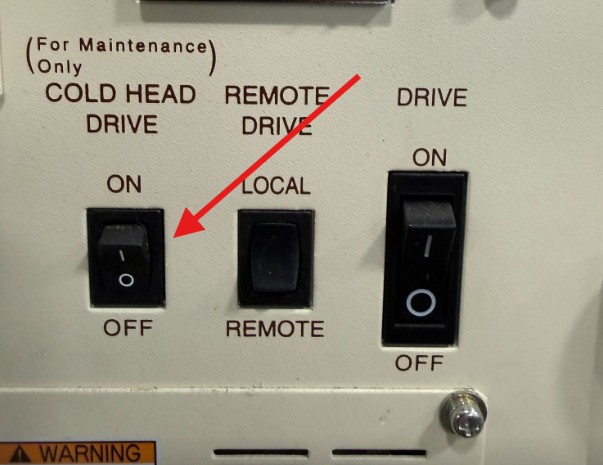
- Once located, place the cold head into a driving state. At the cold head, you will hear evidence that the cold head motor is turning. There will be slight swishing sounds coming from the lines or light thumping or clicking. Keep the cold head and helium compressor in this state until the shield temperature reaches 90K.
NOTE: If the cold head continues to slip intermittently or locks up completely this is evidence that the cold head is likely not contaminated and that there is a mechanical issue within the cold head itself and a cold head change is required.
Purge the regulator and prepare the new bottle of 5.0 UHP helium
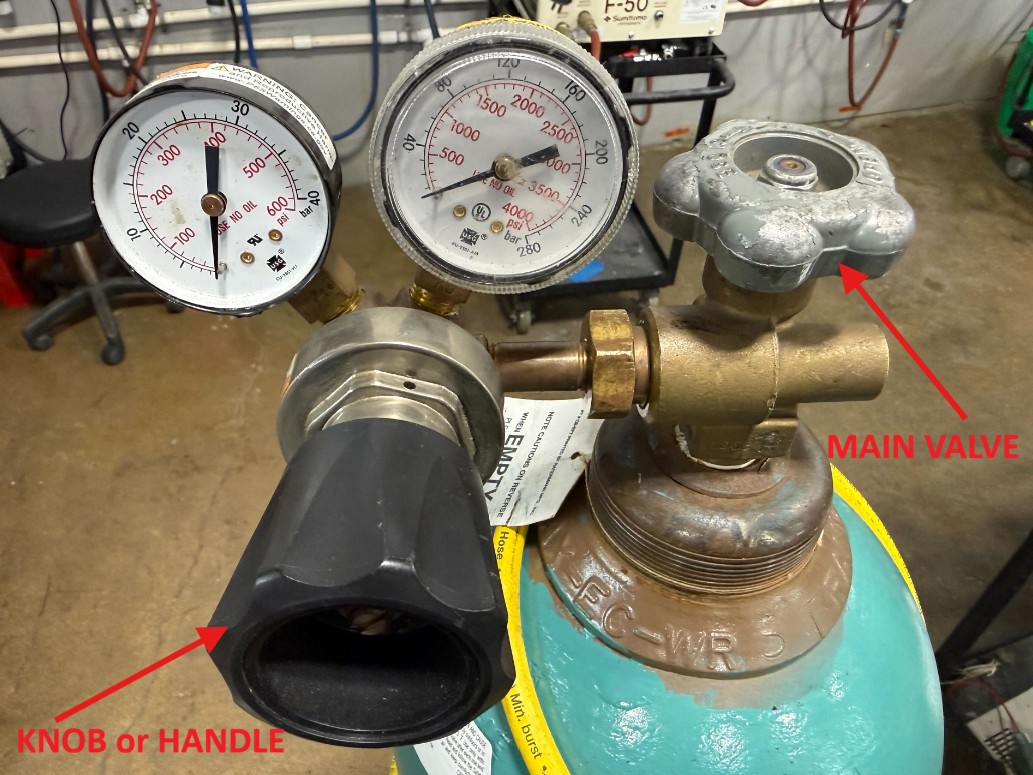
- Connect your high pressure gas regulator to the helium bottle and tighten it.
- If required, connect the regulator’s T-handle or knob.
- Engage the handle or knob so that the diaphragm opens.
- Slowly open the main valve on the helium bottle.
- Once the cylinder valve is slightly cracked and helium gas is flowing out of the regulator,disengage the diaphragm handle or knob so that helium flow stops. (This step is critical and flushes any atmospheric gas out of the regulator preventing significant contamination to the 5.0 uhp bottle.)
- Connect the high pressure charge hose to the regulator.
Discharging the system and gas replacing
Once the shield temperature on the system has reached 90K you may proceed.
- Connect the charge fitting to the helium compressor charge port.
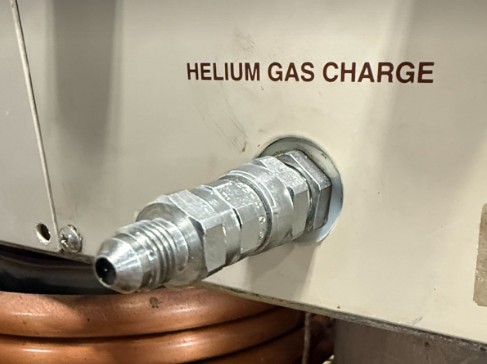
- Engage the charge fitting to vent down the helium from the system to 0.1MPa / 100kPa / 1bar.
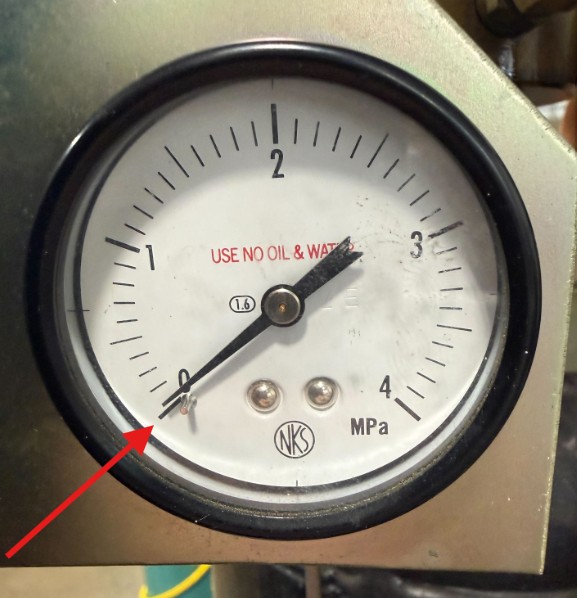
- While the system is venting down, lightly purge helium from the cylinder through the high pressure hose.
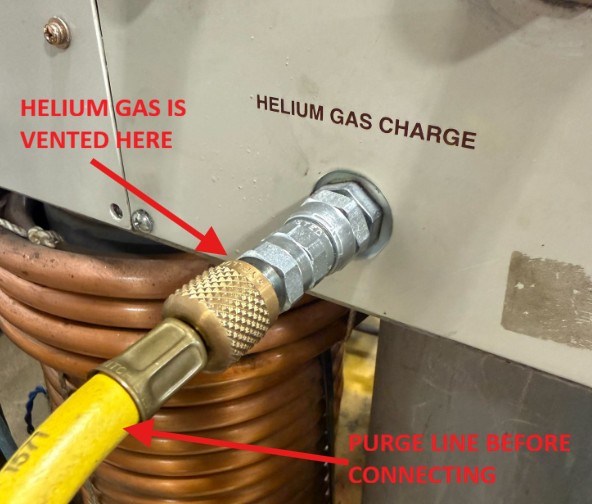
- When the compressor gauge reads 0.1MPa / 100kPa / 1bar connect the high pressure charge hose to the charge fitting while both fittings are venting gas in order to keep contamination from entering the system.
- Charge the system back up to static operating pressure. Refer to the helium compressor documentation for the correct set pressure.
- Once the helium compressor is at proper static pressure, turn off the main valve on the cylinder but keep the regulator knob set.
- Loosen the charge hose from the charge fitting until gas begins to leak out.
- Once the pressure on the system reaches 0.1MPa / 100kPa / 1bar, tighten the charge hose to the charge fitting so that it stops leaking helium.
- Repeat steps 5-8 a total of 3 times.
- Charge the system back to static operating pressure.
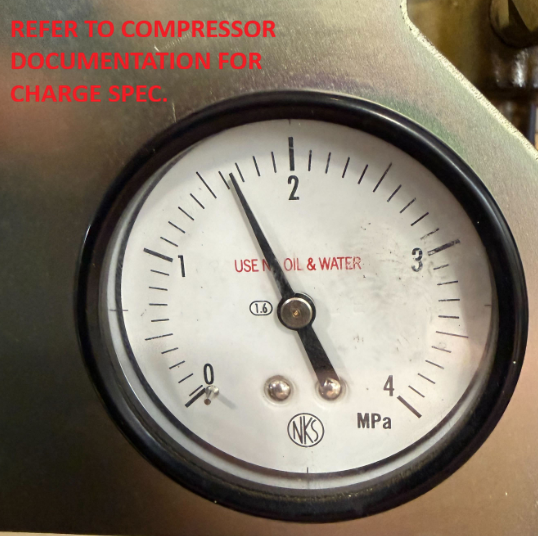
- Turn off the cold head drive mechanism.
- Power on the helium compressor and monitor the cold head temperatures and sound.